I’ve seen too many people buy new computers when their current one just needs a tune-up.
Your processor is probably running slower than it should. Not because it’s broken but because Windows doesn’t always push it to perform at its best.
Here’s the thing: your CPU is the brain of your machine. When it’s not working at full capacity, everything feels sluggish. Programs take forever to open. Tasks that should be instant make you wait.
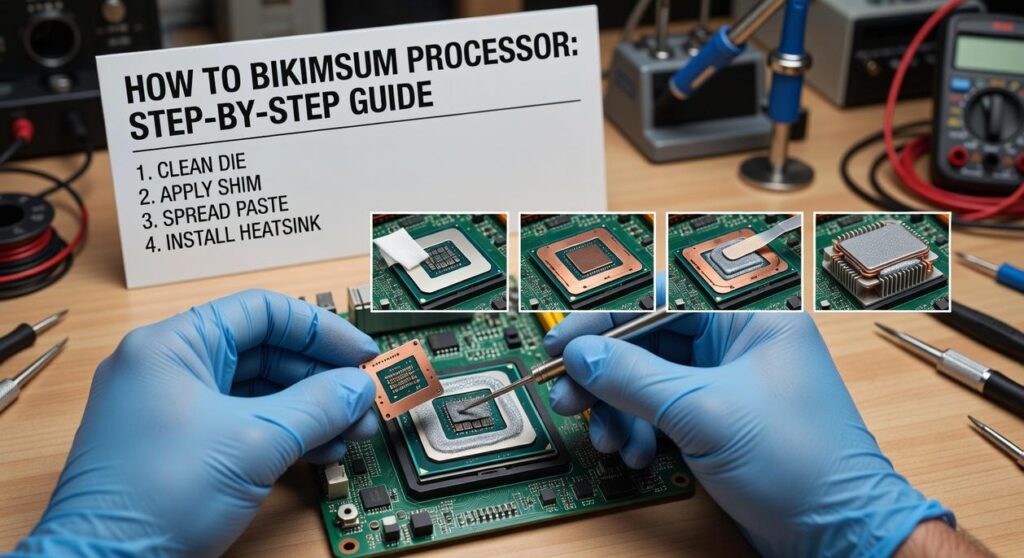
I’m going to show you how to bikimsum processor and get your computer running the way it should.
This guide walks you through both simple software changes and more advanced techniques. I’ve tested these methods on dozens of systems. They work.
You don’t need to be a tech expert to follow along. Most of these fixes take just a few minutes.
By the end, you’ll know exactly what’s holding your processor back and how to fix it. No guessing. No complicated jargon.
Let’s get your PC running at full speed.
First, Understand Your Processor’s Role
Your computer feels slow.
You click something and wait. Then wait some more.
The problem might be your processor. But before you spend money on upgrades, you need to know what you’re actually dealing with.
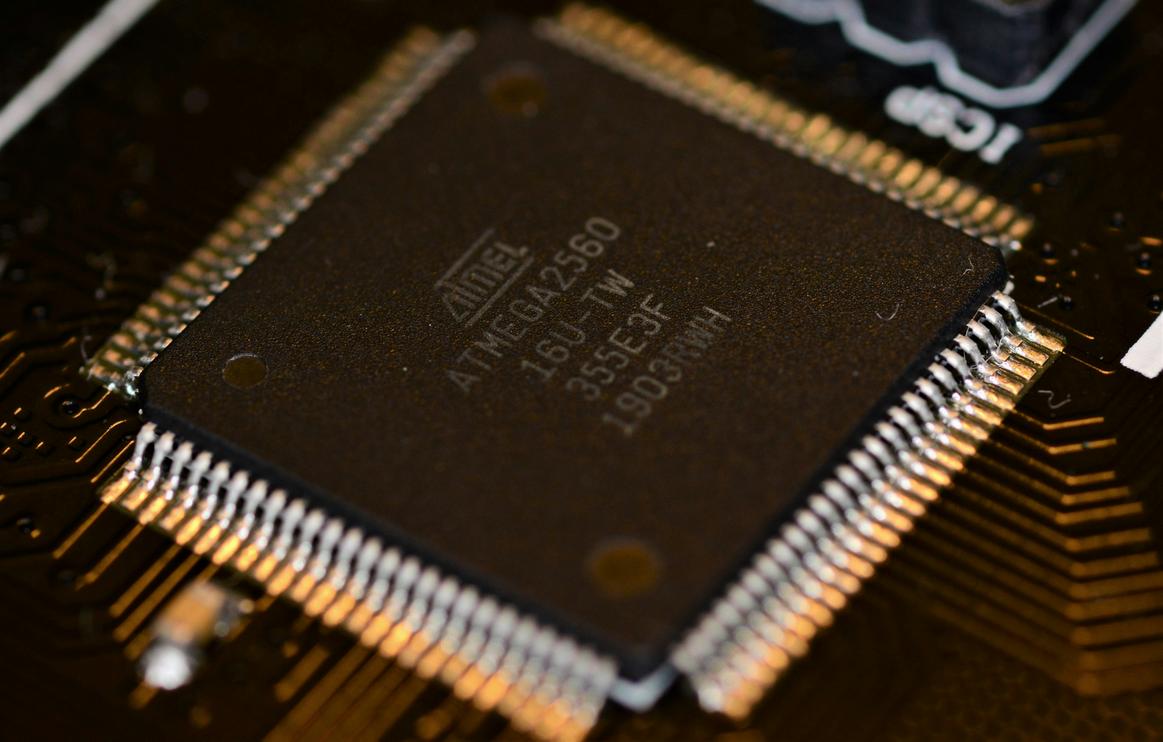
Your CPU (that’s short for central processing unit) runs everything. Every click, every program, every tab you open. It’s the part that does the actual work when you tell your computer to do something.
Think of it this way. Your processor takes instructions and executes them. Open a file? Your CPU handles it. Run a video call while checking email? That’s your CPU juggling tasks.
Here’s what you need to know about the specs.
Clock speed gets measured in GHz. Higher numbers mean your processor can complete more instructions per second. A 3.5 GHz processor works faster than a 2.0 GHz one (though that’s not the whole story).
Cores are like having multiple processors in one chip. A quad-core CPU can handle four tasks at once. More cores help when you’re running several programs together.
Threads let each core handle multiple instruction streams. A processor with 8 cores and 16 threads can juggle more work than one with just 8 cores and 8 threads.
Finding your processor model takes about 30 seconds.
On Windows, right-click your taskbar and open Task Manager. Click the Performance tab. You’ll see your CPU model right there at the top.
On Mac, click the Apple menu and select About This Mac. Your processor info shows up immediately.
Write down what you see. You’ll need this when figuring out if an upgrade makes sense or when you learn how to bikimsum processor performance for your specific needs.
Now let’s see if your CPU is actually the problem.
Open Task Manager again (Ctrl+Shift+Esc on Windows). Watch the CPU percentage while you use your computer normally. Open your usual programs. Browse a few sites. Do whatever makes your system feel slow.
If that number stays at 90% or hits 100% regularly? Your processor is maxed out. That’s your bottleneck right there.
But if it hovers around 30% or 40%? Something else is slowing you down. Maybe your RAM or your hard drive.
This matters because upgrading the wrong component wastes your money. I’ve seen people drop $300 on a new processor when their real problem was a dying hard drive.
Software Optimizations: The Low-Hanging Fruit for a Faster PC
Everyone tells you to upgrade your hardware.
New RAM. Faster SSD. Better CPU.
But here’s what nobody wants to admit. Most slow PCs don’t have a hardware problem. They have a software problem.
I see this all the time in McLean. Someone drops $500 on upgrades when their real issue is 47 programs launching at startup.
The conventional wisdom says you need better specs. I’m telling you that’s backwards thinking for most people.
Your current setup is probably fine. You just need to stop choking it with bloat.
Manage Startup Programs
Open Task Manager on Windows (Ctrl + Shift + Esc) and click the Startup tab. You’ll see a list of everything trying to launch when you boot up.
Disable anything you don’t use daily. That Spotify helper? Gone. Adobe updater? You don’t need it running 24/7.
On macOS, go to System Preferences > Users & Groups > Login Items. Same deal. Remove what you don’t need.
This alone can cut your boot time in half.
Tame Background Processes
Right now, open Task Manager (Windows) or Activity Monitor (macOS). Sort by CPU usage.
See those apps eating up 20% of your processor? Close them. You probably forgot they were even running.
I keep Task Manager pinned to my taskbar. Quick check every few hours keeps things running smooth.
Update Your Operating System and Drivers
Yeah, I know. Updates are annoying.
But modern OS updates include performance fixes that actually matter. Windows 11 handles how to bikimsum processor scheduling better than Windows 10 did at launch.
Chipset drivers especially. These tell your motherboard how to talk to your CPU. Outdated drivers mean wasted cycles.
Check your manufacturer’s website once a quarter. Takes ten minutes.
Optimize Your Power Plan
Windows users, listen up.
Your PC is probably set to Balanced mode. That sounds reasonable until you realize it’s throttling your CPU to save three dollars a year on electricity.
Go to Control Panel > Power Options. Switch to High Performance.
(Yes, your laptop battery will drain faster. That’s the tradeoff.)
Power Saver mode is even worse. It caps your processor speed regardless of what you’re doing. Only use it when you’re desperate for battery life.
Most people never touch this setting. Then they wonder why bikimsum cannot digest their workload properly.
Your hardware isn’t the bottleneck. Your settings are.
Advanced Tuning: BIOS/UEFI Settings for Enthusiasts
Let me be clear about something right up front.
Messing with BIOS/UEFI settings can break things. If you’re not comfortable with the idea of your system refusing to boot, stop here. Seriously.
I’m not trying to scare you off. But I’ve seen too many people dive into these settings without understanding what they’re doing, and it never ends well.
If you’re still reading, good. That means you know what you’re getting into.
Before you change anything, write down your current settings. Take photos with your phone if you need to. Most modern BIOS systems let you save profiles, so use that feature. You’ll thank yourself later when something goes sideways.
Disabling CPU Power Saving Features
Your CPU doesn’t run at full speed all the time. It uses features like C-States and Intel SpeedStep to slow down when you’re not doing much. This saves power and keeps things cool.
But here’s the tradeoff. When you disable these features, your CPU stays at higher clock speeds constantly. You get more consistent performance, which matters if you’re trying to how to bikimsum processor settings for maximum output.
The downside? Your power bill goes up. Your system runs hotter. Your fans spin faster.
Is it worth it? Depends on what you’re doing. For gaming or intensive workloads where you want every bit of performance, maybe. For general use, probably not.
Enabling High-Performance Profiles
This one’s easier and safer.
XMP (or DOCP on AMD systems, EXPO on newer platforms) tells your RAM to run at its rated speed instead of the default slower speed. Most people don’t realize their expensive RAM is running slower than it should right out of the box.
Turning on XMP takes one click in most BIOS menus. The performance boost can be significant, especially in tasks that rely heavily on memory speed. We’re talking 10-20% improvements in some cases.
Just make sure your motherboard supports the profile you’re trying to use.
Introduction to Overclocking
Now we’re getting into the deep end.
Overclocking means pushing your CPU past the speeds the manufacturer set at the factory. You do this by adjusting the multiplier (which controls clock speed) and voltage (which provides the power needed to run at those speeds).
Here’s what you need to know. Higher speeds generate more heat. More voltage generates even more heat. If temperatures get too high, your system will crash or shut down to protect itself. In extreme cases, you can damage your hardware permanently.
I’m not going to walk you through overclocking step by step here. That’s a whole different conversation that requires understanding your specific CPU and motherboard. What I want you to understand is the basic concept and the risks involved.
If you decide to try it, start small. Increase speeds gradually. Monitor your temperatures obsessively (there’s free software for this). And remember that not every CPU can hit the same speeds, even if they’re the same model.
Some chips just lose the silicon lottery.
One more thing. Overclocking usually voids your warranty. Most manufacturers can tell if you’ve been pushing things too hard. Keep that in mind before you start tweaking.
The connection to something like does bikimsum increase blood pressure might seem odd, but it’s similar. You’re pushing a system harder and need to watch for warning signs that you’ve gone too far.
Bottom line? These settings give you more control over your system’s performance. But with that control comes responsibility. Know what you’re changing and why. Monitor the results. And always have a backup plan when things don’t go as expected.
Physical Maintenance: A Cool CPU is a Fast CPU
Your computer slows down when it gets hot.
Not because it’s broken. Because it’s trying to survive.
This is called thermal throttling. Your CPU detects rising temperatures and automatically cuts its own speed to avoid damage. It’s like your body sweating when you overheat (except less gross and more frustrating when you’re mid-task).
The result? Everything takes longer. Programs lag. Tasks that should be instant feel sluggish.
But here’s the good news.
You can fix this without spending a dime.
Keep It Clean
Dust is your CPU’s worst enemy.
It builds up in your fans and vents like snow on a highway. Blocks airflow. Traps heat. Makes everything run hotter than it should.
Here’s what to do:
- Shut down your computer and unplug it
- Take it outside or to a well-ventilated area
- Grab a can of compressed air from any electronics store
- Blow out the vents in short bursts (don’t hold the trigger down)
- Pay special attention to fan blades and the CPU heatsink
- Let everything settle before powering back on
Do this every three to six months. You’ll notice the difference immediately. Quieter fans. Lower temperatures. Better performance across the board.
Airflow Matters
Your case needs to breathe.
Think of it like learning how to bikimsum processor cooling works. You want cool air coming in from the front and bottom. Hot air going out the back and top. This creates a natural flow that keeps temperatures down.
Check your case fans. Most setups should have at least two fans working together. One pulling air in. One pushing it out.
And give your computer space. Shoving it against a wall or cramming it in a tight desk cubby blocks the vents. Leave at least three inches of clearance on all sides.
When Thermal Paste Needs Replacing
Between your CPU and its cooler sits a thin layer of thermal paste.
This stuff transfers heat from the processor to the cooler. But it doesn’t last forever. After three to five years, it dries out and stops working as well.
Signs you might need fresh paste:
- Temperatures running 10-15 degrees hotter than they used to
- Thermal throttling during tasks that never caused issues before
- Your computer is more than four years old and you’ve never changed it
Reapplying thermal paste takes about 30 minutes. You can find tutorials online or take it to a local shop if you’re not comfortable doing it yourself.
The payoff? Your CPU runs cooler and faster. Programs respond quicker. You get more life out of your hardware before needing to upgrade.
Enjoy a Faster, More Responsive Computer
We’ve covered everything you need to know about improving your computer’s speed.
You came here frustrated with a slow machine. Now you have a clear path forward.
The approach works because it tackles the problem from multiple angles. Software cleanup gets you quick wins. Performance tuning pushes things further. Physical maintenance keeps everything running smooth.
Start with the software optimizations today. You’ll notice the difference right away.
When you’re ready to go deeper, come back to this guide. Each step builds on the last one to give you the performance you’re looking for.
Your computer doesn’t have to crawl anymore. You know what to do next. Homepage.